I don't often do process posts that show my sketchbook because my drawings are very raw and it makes me uncomfortable to let people peek at that part of it all. But, I'm going to be brave today. :)
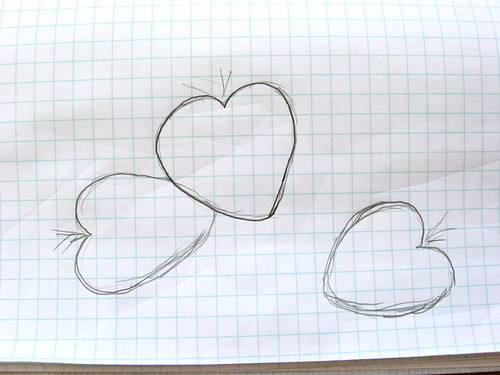
Here is a sketch of the strawberries. I darkened the lines so you could see them.
The main purpose for redesigning this block was that I wanted two of the berries to touch. I also wanted to consider putting the strawberries on a tablecloth or shelf or in a bowl, so I wanted a berry block without the outside border on it.
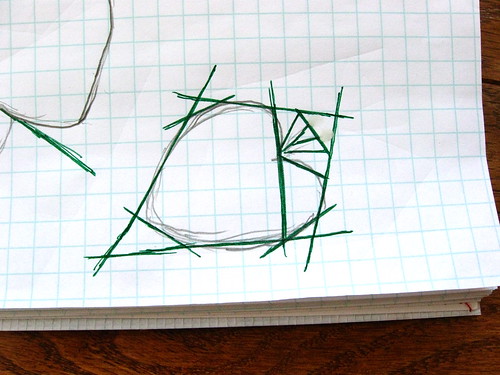
Now I start to draw my seam lines. I draw the first four lines to enclose one little block.
My berry block will be the odd shape on the inside of those lines. Outside those lines will be the
border/sashing/background that I'll worry about later.

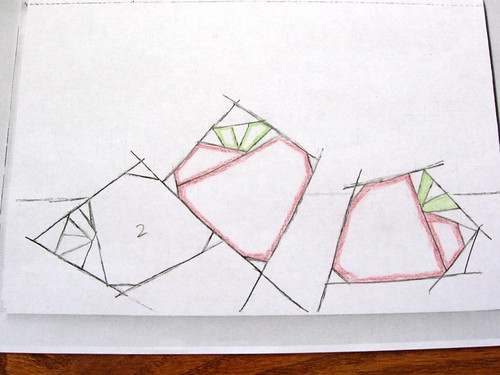
Then I continue drawing lines until I'm comfortable with the shape. It still looks a little blocky, but that is going to be the charm of my berry block. Can you see how the straight lines start to approximate the curves, but still leave a little something to the imagination?
Okay, now I'll return to yesterday's drawing after it was cleaned up with a little
eraser and colored pencil...
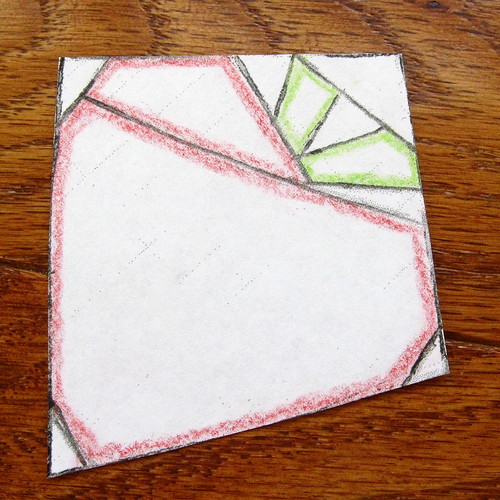
and I'll cut out my first berry block.
The hardest part I had to learn about paper piecing was putting the numbers on my own blocks.
The trick that worked for me was NOT to look at the portions of paper being numbered.
Instead, I look at the seams or lines between those numbers.
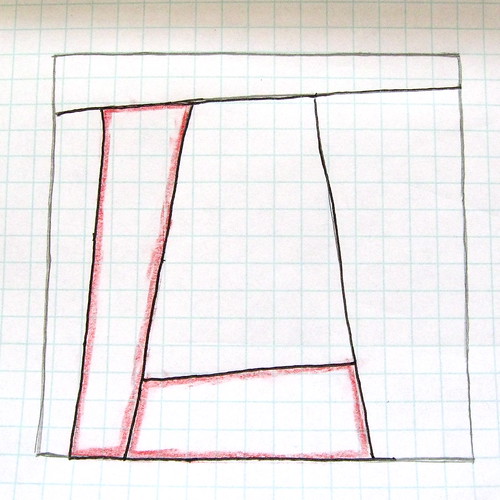
If you look below at my "L" block, and look only at the seams, you can probably figure out
which order to do the seams in to minimize any complicated seams.
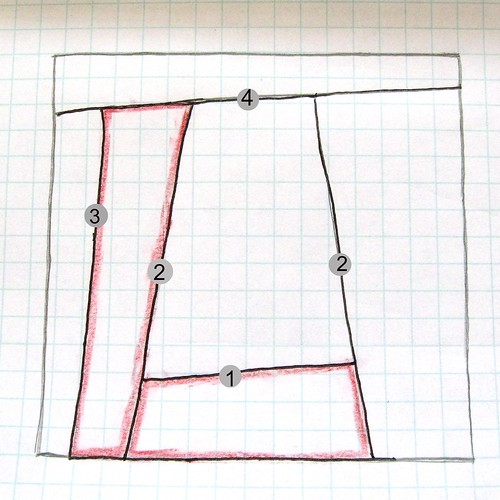
Here is the same block with priority of seams. I did this in my head before putting numbers on the block sections, but I thought that this might help you see it better.
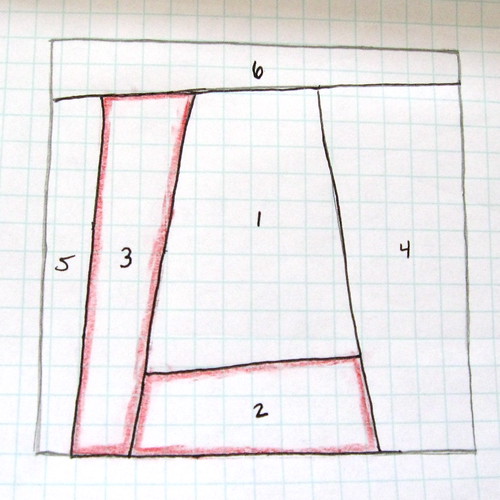
Using that seam priority, these are the section numbers I came up with. Yours may differ slightly.
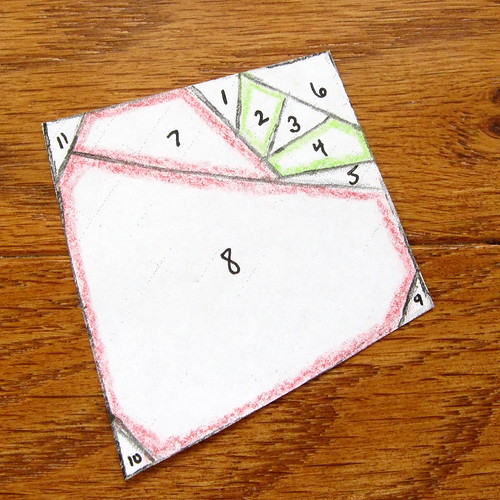
Let's look at that strawberry again.
Now choose which seams need to go first or which needs to go last.
You can work forward or backward.
This is a representation of how I see it in my head.
And here is how I numbered it. Your numbers, again, may differ slightly.
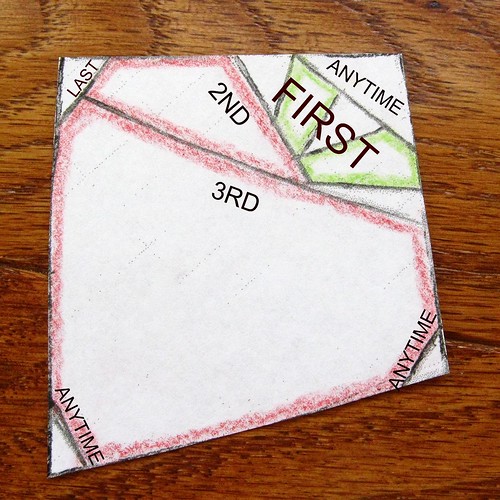
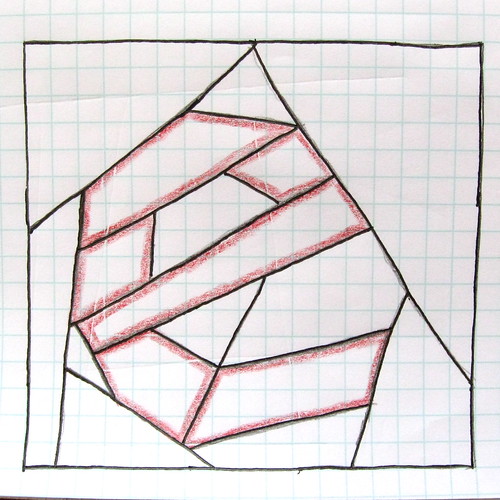
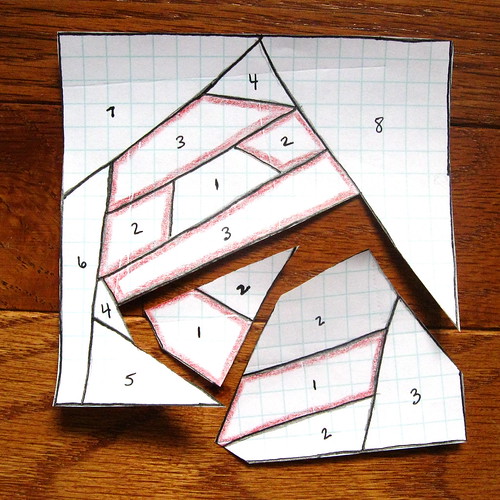
For a more complicated example, here is the "e" block I did a few weeks ago.
This one needs to be cut in sections as I number it.
These are the sections that I cut.
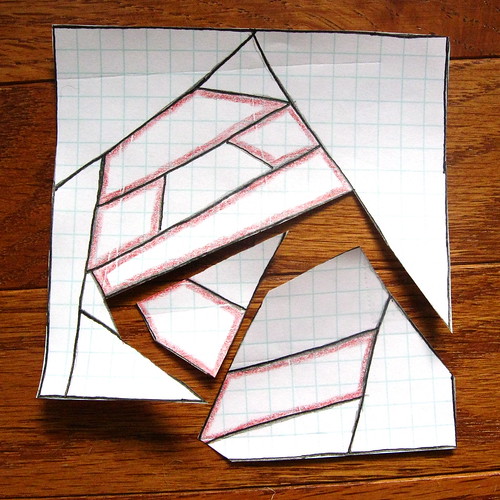
On my original drawing, I put hatch marks on the lines that need to be cut and then I numbered the drawing a little differently. Since there are three sections, there are three #1 pieces. Then I numbered ALL of the second priority pieces as #2's. Then I did the same for the third priority pieces. After the #3's are sewn on, then all of the block chunks have to be sewn together before the fourth priority pieces can be sewn on. Lastly, after the #4's, the rest of the numbering continues with one piece at a time.
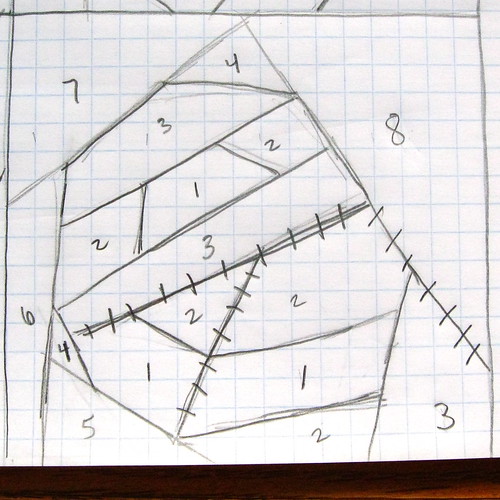
Here are the cut sections with all of the numbers in place.
Is that clear as mud? I'd suggest you take some time to let this sink in.
I threw three different numbering system options at you.
We numbered the seams by priority.
Then we numbered each piece, one at a time.
And, then we numbered the pieces by priority.
I hope that giving you different options will let you choose the system that makes sense for you.
Let me know how it works.
I'd also be curious if you have a fourth or fifth way of thinking about how to
number your blocks, so comment away. :)
Lastly, If you try any of these blocks, remember that you have to reverse the image before you paper piece them. I design and number my blocks before flipping the image because it is easier for my brain to see how it will come together. I also keep one copy of the pattern (that is not flipped) on my sewing table so I can refer to it as I put the block together. Having the final image as a reference helps me a lot.
Happy sewing and designing and block dreaming to you!
8 comments:
Thanks for taking the time to do this Melinda! It's very clear to me and I like the different options you've given. What's especially helpful is looking at the seams instead of the pieces... such an eye opener!
I'm planning on another practice block this afternoon :-)
Wow, thanks :) I've just sewn my first paper pieced block (from a pattern) and liked it very much and I'd love to design my own, so your post is a great help.
This is so helpful! Thank you for showing how you wrap your brain around the numbering. It's still the most challenging part for me.
This is so helpful! Thank you for sharing.
you amaze me. again with the mind blowing...
after reading all of this i definitely need to go knit on my mitered crosses blanket. :)
Really interesting! Thanks for doing this :)
Thanks for walking me through your design process. Superb tutorial.
I'm a beginner at paper piecing, this is a well-timed tutorial for me as I need to design blocks that will have to be paper pieced, and this has helped getting a handle on that numbering process.
Post a Comment
You are awesome! Thanks for leaving a comment :)