One pincushion down, two to go.

I got so excited by the number of comments on my custom pincushion giveaway, that I decided to make three of them.  Well, I have one finished now.  Charise requested a "C" in red, aqua and/or mustard.

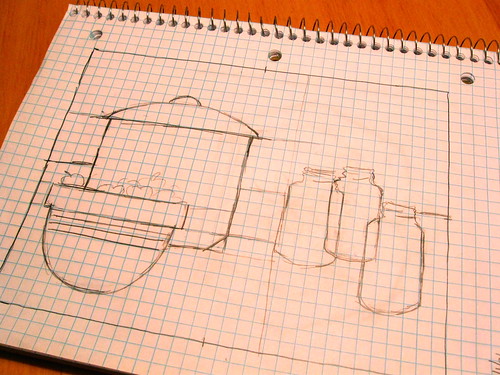
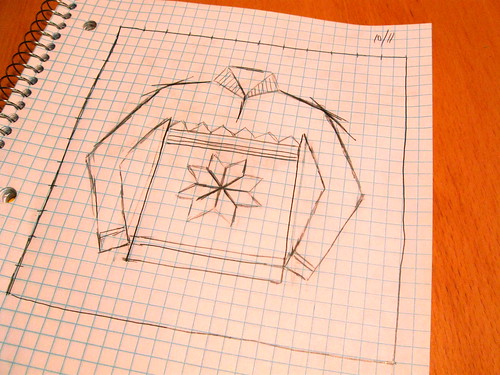
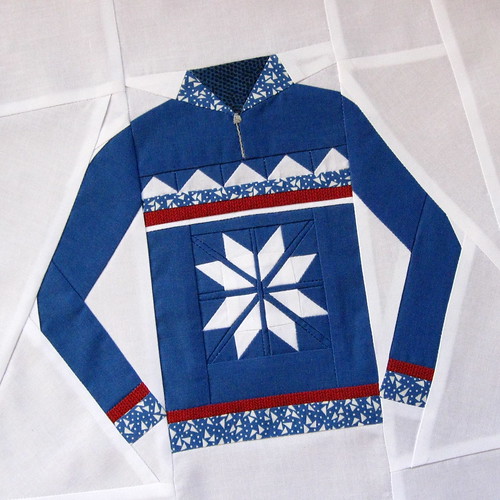
I used a mix of paper and improvisational piecing.  Straight paper piecing will give accurate results and a clean finished project, but I'm often too lazy to go to the copy store to reverse my drawing and also too lazy to wrestle with the paper for the tiny piecing.  So, first I start with a detailed drawing. 

drawing


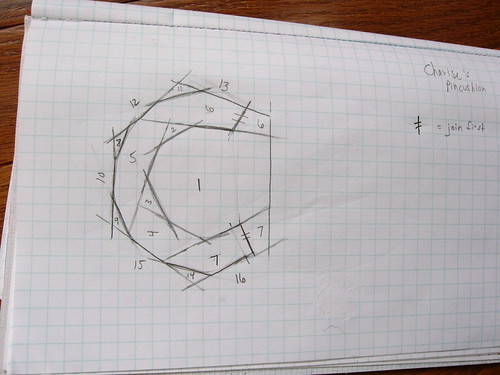
Then I make at least two regular copies of my drawing (my copier at home can do this much) and I cut out piece 1 like a template and I cut out pieces 1-7 all joined as a second template. 


template copies


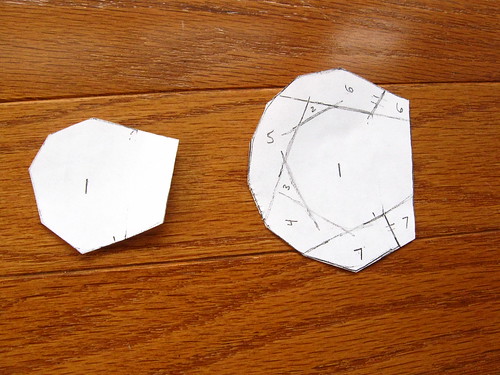
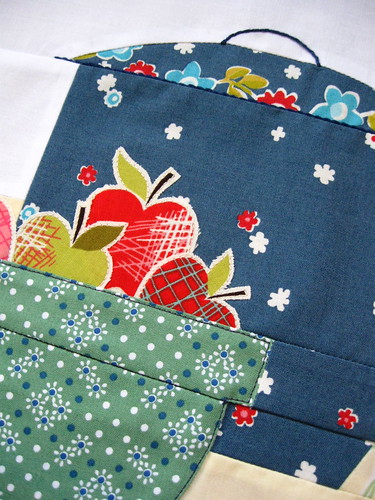
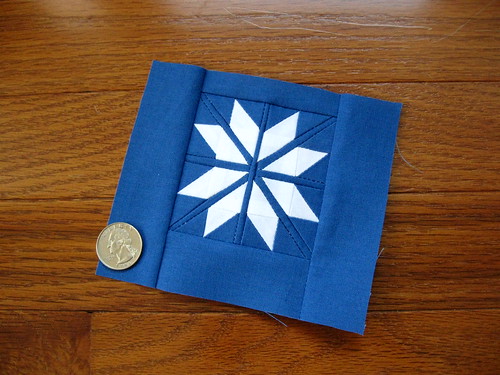
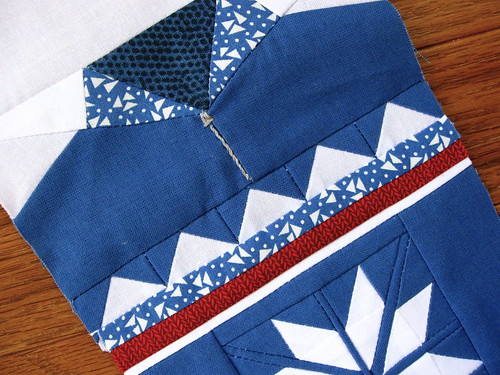
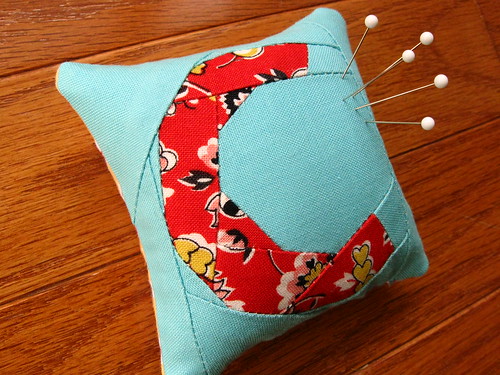
You'll see that pieces 6 and 7 have extra hash marks because the red fabric has to be joined to the aqua background fabric before joining it to piece 1.   So, next I prepare pieces 6 and 7 by sewing two small strips of the two colors together.  Then I use my template of piece 1 to cut the aqua background fabric adding a 1/4" seam allowance all around.  Next I sew pieces 1-7 together and use the 1-7 template to trim off the excess fabric (remembering to add a 1/4" seam allowance).  Then I continue piecing 8-16 on.  Then I trim that to a square and make it into a pincushion.

I don't know if that clarifies anything, but I thought I'd try to explain my process a little.  Someday I'll have to remember to take more pictures when I'm in the midst of this piecing.  (I think I turn into a sewing/cutting/ironing whirling dervish when I'm in the middle of making these blocks, so the photos may be awhile.)


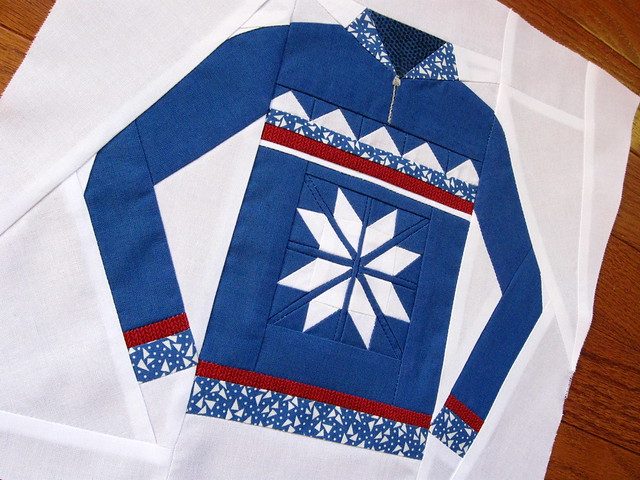
I placed some plain white fabric behind the front and back squares of the pincushion before sewing them together.  I stuffed this pincushion with crushed walnut shells--otherwise known as "lizard litter" at the pet store.  Then I whip stitched the opening closed.


C pincushion


Okay!  This will be on its way to Charise soon!
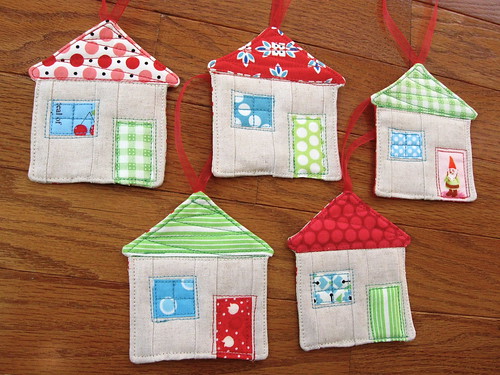
I have a "V" and an "S" pincushions left to do for the giveaway, so stay tuned. 

For those of you that want to try paper or improv piecing and designing your own blocks, I highly recommend practicing with letters of the alphabet. Especially L, T, H, V, M, A or a squared-off O. Then you can try curved letters C, U, D or a curved O.  I'd save a curved S, B, G, Q, R and lowercase e and g for last.  I did other posts here and here about my designs for a couple of other letters.  Good luck to you!

Quietly Busy

I've been puttering away in the sewing room, pondering my next big project and trying to finish some of the smaller things on the list.  I've been planning for weeks to try to whittle my WIP's down to single digits by the new year.  That just isn't happening so far, though.  For instance, this past week the holiday workshop had to open up for the Trim the Tree Handmade Ornament Swap

Trim the Tree Handmade Ornament Swap design


These are made with linen, some favorite fabric scraps and extra thread for the details. 


ornaments


I'm even working on a Halloween decoration because I found a kit that I just couldn't pass up and couldn't leave until next year.  You'll have to wait a bit to see that one, though.  
Thankfully, I'm not planning on any turkey-themed projects.  

What about you?  Are you completely done with Halloween sewing?  
Anything for Thanksgiving?  Have you started on the gifts yet?

Cocorico blocks for October and November

I was behind in making blocks for this bee, but I plugged away
at these two over the weekend so I could catch up.

For the month of October, Annabel assigned us a 12x16" block with an orchard theme.  When I think of orchards and pick your own fruit, I think of my canner and jars.  I love picking my own fruit but my eyes are bigger than our tummies and my time is never as big as our pantry.  So I have to limit myself to picking only as much fruit as I'm able to can or freeze in a half of a day.
I came up with this block sketch:


The canning jars intimidated me, so I took my time and pieced
the canner and the bowl of apples first.
 
peek for Annabel


I used freezer paper to do the canner lid curve and I embroidered the handle and the lip of the lid.  I used fusible web and raw edge applique to do the apples.  I don't know the name for the technique I used for the bowl.  Can I admit that I feel like a hack when I use a process and I can't even put it into words?  But when I learn more about it, I promise to do another post explaining it.  okay?


jars for Annabel's block


Anyway, I used the mystery applique technique for the jars, too, and then put them on with some white thread.  Then I did some thread sketching in blue for the jar details.  On a whim I picked out two blue colors for the sketching and I thread them both through my needle and stitched them at the same time.  Kooky, I know, but it worked like a dream, so I'm sticking with it.


October Orchard Themed Block

Here is the finished block.  I wish I hadn't let it intimidate me so, but I'm pleased with the results.
.................................


And, now on to the November block.  Krista and her family are big skiers, so she requested 10 to 14" blocks with the theme, "Let's hit the slopes!"  I don't downhill ski, but I do love cross country skiing.  I learned to ski from an old housemate that also taught me how to knit.  Both will forever be linked in my mind,
so I had to sew a ski sweater.  Here is my sketch:

November


I started with piecing a snowflake out of the tiniest HST's I've ever done.
Those blue and white squares are only 5/8". 

start of a ski sweater


Then it was on to tiny flying geese, a Y-seam at the collar and embroidering a zipper.


sweater block in progress


Lastly, I had the task of making the sleeves "jaunty" (as Krista put it) but not too silly-looking.


November Ski Sweater Block

I must admit that these blocks are hard ones to tuck into the mailbox  :)

Ski Sweater


Well, thanks for letting me ramble on and post a ridiculous amount of photos for only two blocks.
I LOVE reading process posts by other quilters because I learn so much.  But I'm also a bit shy about showing my sketchbook and partial block photos.  I hope you don't mind the peeks into my process.

Late Costume Post

Henry was Officer Buckle for Halloween (from the wonderful children's book Officer Buckle and Gloria).  He's been talking about Officer Buckle for many months now, 
so this costume seemed like the way to go.

Officer Buckle

I bought a boy's size 5 shirt from Goodwill and cut off the sleeves and cut down the sides to fit him and then put it back together.  I used the extra fabric for the tabs on the shoulders.  Then I got some silver jeans buttons to add some "flair".  I made the belt with two compartments and sewed a sewing tape measure in one and a film canister in the other and added a plastic buckle that I had lying around.  
The police hat was skipped because there was no way he'd leave it on.

Costume

The Saturday before Halloween is the children's costume parade in our town.  
Ben took Henry since I was sick that day.  Henry's stuffed dog is standing in for Gloria. 

at the park

They hit the park swings and slide after the parade.

the officer and "funny faces"

Henry has been enjoying the pumpkins and says, "big pumpkin!" every time he sees one.  
Jack o' lanterns are called "funny faces!"

I hope your Halloween was a blast, too.