
I am in three or four virtual quilting bees at any time, I participate in a few swaps, and I have at least two or three quilt gifts in the process. I've noticed that when making bee blocks, gifts or swap projects that I come up with a fabric combination I love love love and then I have to send it off in the mail to someone else. I usually don't want or need a full quilt out of that fabric combination, but I still want a little piece of it to save for myself. So, I designed the Heirloom block for the Sew Out Loud quilt along.
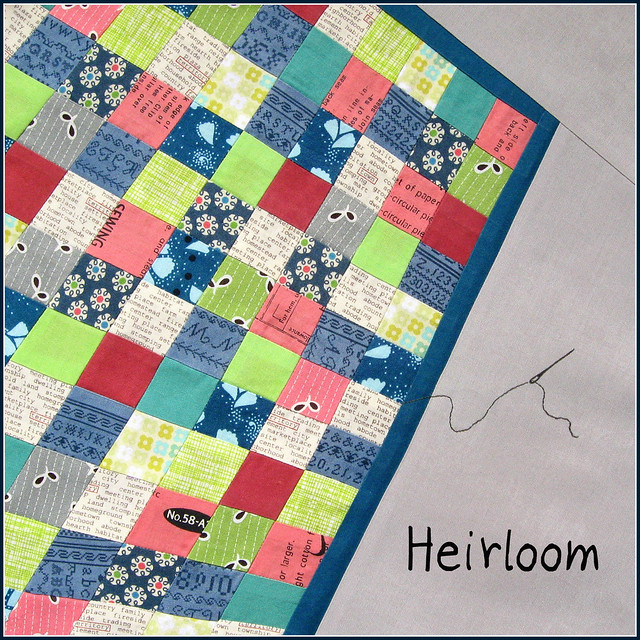
Can you imagine a quilt made of these blocks with dates and quilt recipients? Or one block made with baby fabrics framed and embroidered with the baby's name and date of birth and then framed on the wall?
The Fat Quarter Shop generously donated fabrics for this quilt along.
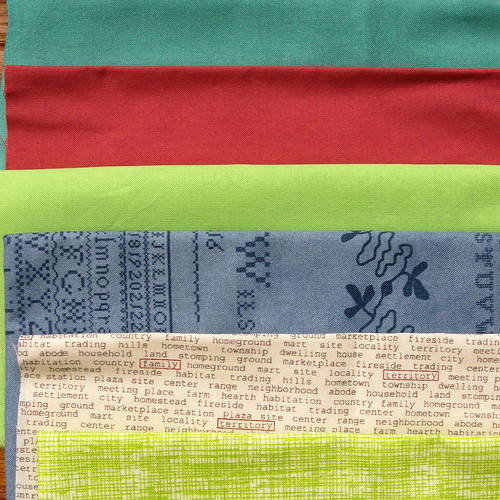
The fabrics in this photo are available at the Fat Quarter Shop.
Moda Bella Solids
Blueberry Crumb Cake by Blackbird Designs in Sky Blue Sampler
Hometown by Moda in Town News in Cream
Sketch by Timeless Treasures in Lime (Lime isn't available at the Fat Quarter Shop at this time, but they have many other colors of Sketch)
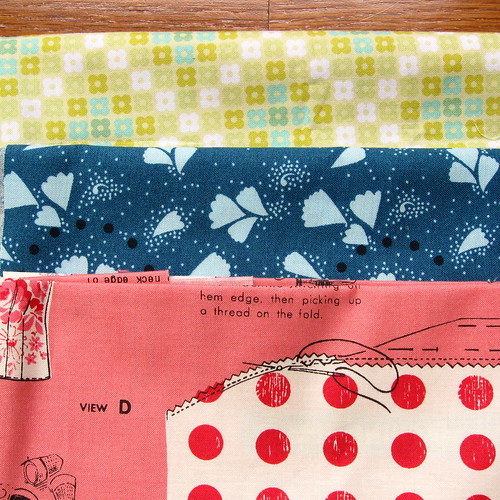
These fabrics are from my stash and the last fabric is an import from Japan and may be hard to find.
Weekends by Erin McMorris in Hopscotch Lime
Innocent Crush by Anna Maria Horner Maybe in Indigo
Sewing Pattern Pieces by Suzuko Koseki in pink (color B)
The first three fabrics were just released but are flying off the shelves. The last one in this photo is only available in Australia .
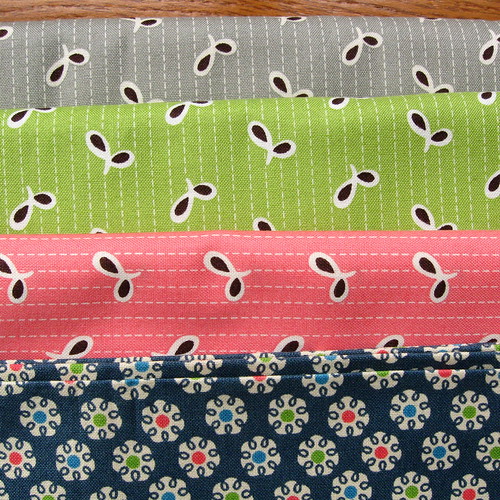
Flea Market Fancy reprint gray seeds, green seeds and pink seeds
DS Quilts print from Denyse Schmidt's Winding Road collection, Australia only print.
To start your own heirloom block, print the template. Download it here. The patchwork portion of this block is made up of 83 scraps approximately 2x2".
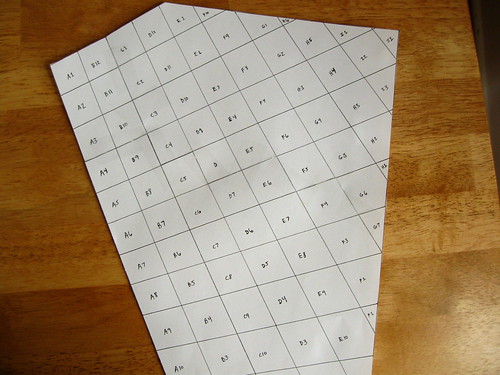
Cut out the patchwork portion of the template.
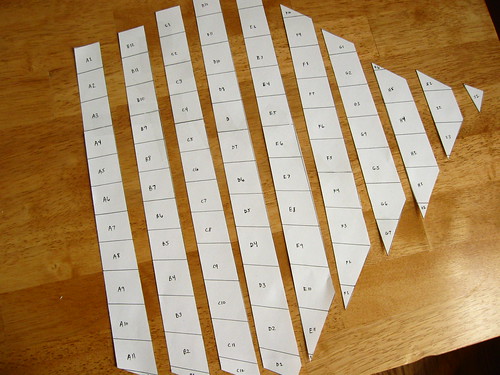
Cut the template into the lettered strips.
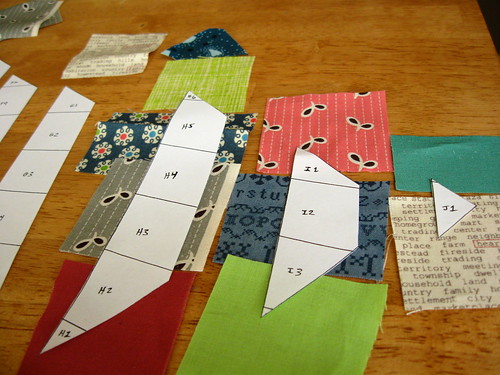
Arrange your little squares into the pattern you prefer.
Use paper piecing technique to piece the strips, ironing after each seam and trimming seam allowances.

Here is an example of how to do the teeny, tiny pieces at the end of a strip. First choose the fabrics.

Then flip the fabrics so the wrong side of the fabric is against the wrong side of the pattern. Leave a seam allowance and stitch along the printed line.

Iron fabrics open. Trim the excess with 1/4" seam allowance around all sides.
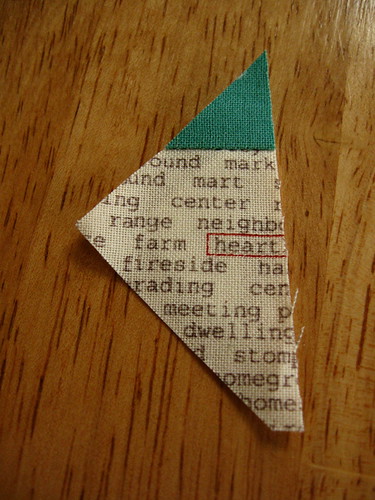
Here is the finished J strip.

The H strip before trimming.
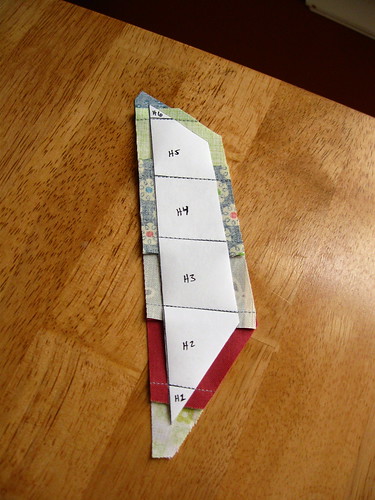
And after trimming.
Once the strip is pieced, I like to starch it heavily. Then trim the edges 1/4" bigger than the template.
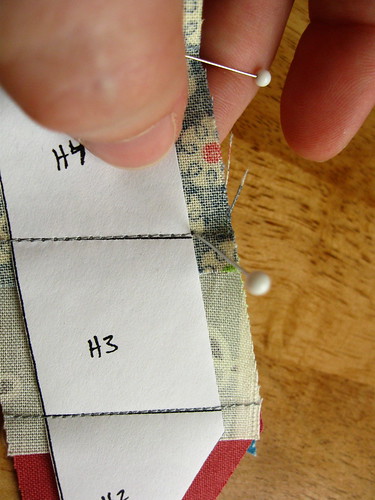
To sew the strips together, match the seams but do not nest the seams. Instead, place your pin through the fabric at the intersection of the paper and the seam.
Poke through to the seam on the other side. Pin each intersection this way.
Then carefully stitch right next to the paper line.
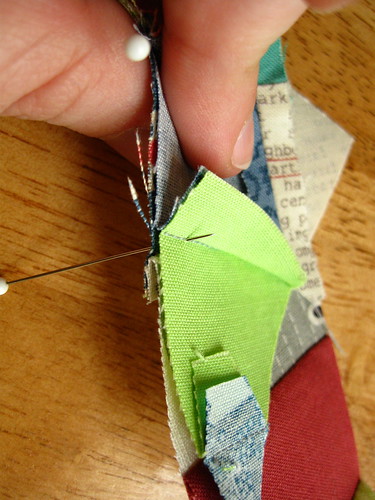
Remove the pins and the paper and iron seam open.

Here is another example of the pins from the front.
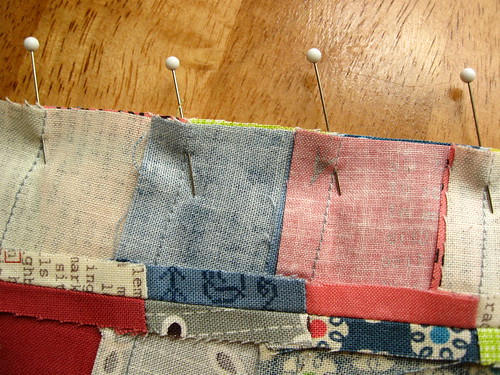
And the back.
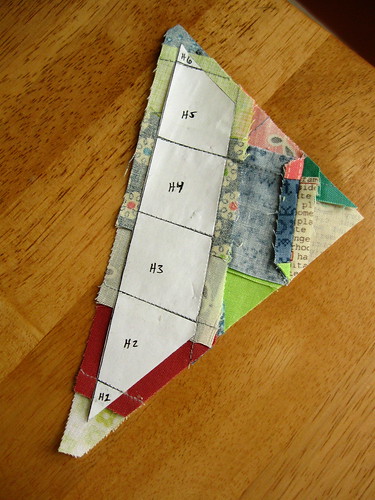
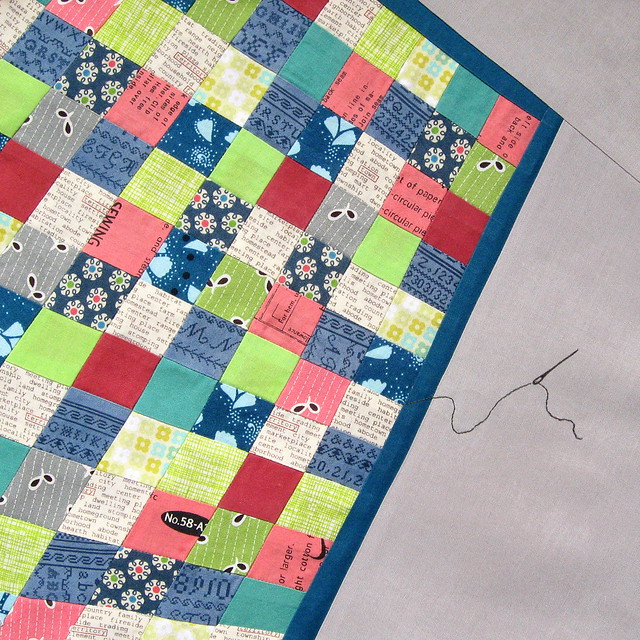
When all of the strips are together in your mini quilt, then add binding piece 1, followed by binding piece 2. Then add background piece 3 followed by background piece 4.
Embroider a "thread" line coming from the quilt.
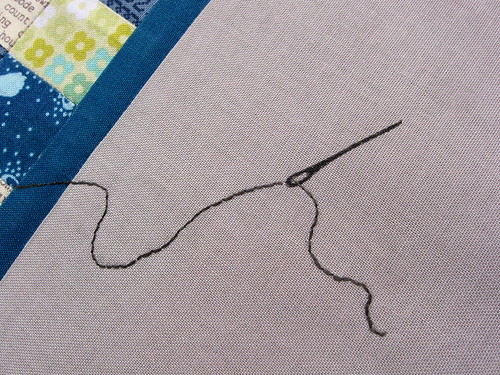
You could embroider the needle itself. Instead, I carved a stamp out of an eraser and stamped my needle on with fabric ink.

Here are some great tutorials for making your own stamps.
If you have any questions about the tutorial, please post them in the Sew Out Loud group on flickr. That way we can all read the questions and answers and learn from each other.
Happy sewing to you!!

