The idea for this quilt tutorial came from one I made in February--the Four Corners Quilt. I attempted a tutorial at that time, but it wasn't pretty. So, here I go again, aiming to do better.
First, I must point you to the link for jelly roll race quilt video. That is where I started from.
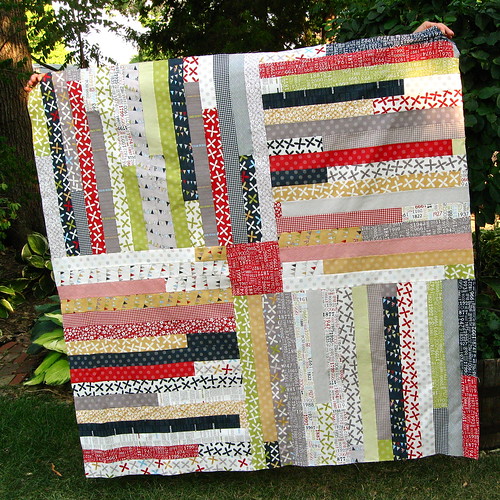
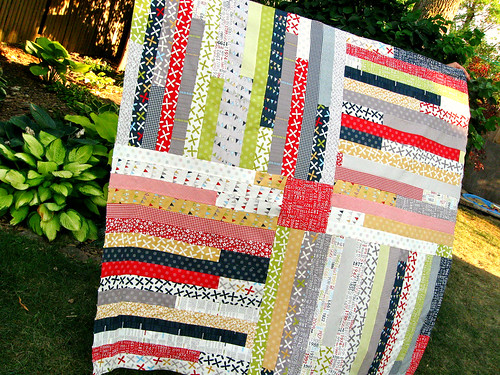
Four Corners Quilt Tutorial -- the quilt will finish at about 56" square.
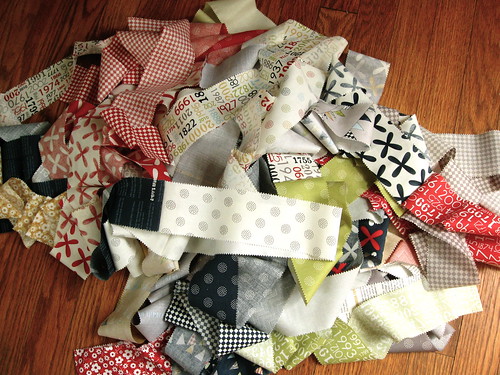
- Start with one jelly roll and one 8 inch square block of coordinating fabric. Rearrange the jelly roll strips randomly. Sew the strips end to end until you have one super super long strip.
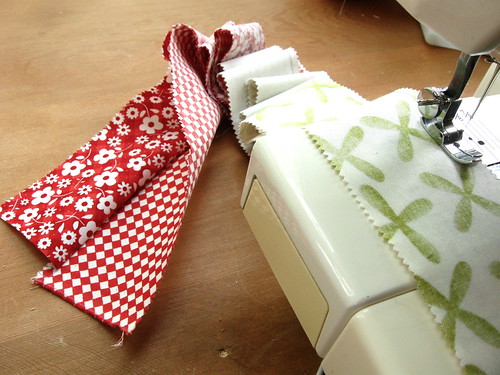
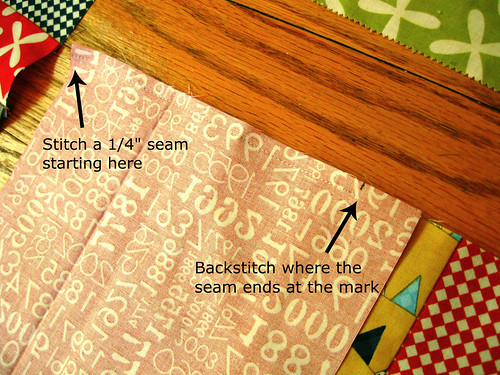
- Cut 15" off of one end of your crazy long strip of fabric. Place the two ends of the strip, right sides together and sew a 1/4" seam all the way down the length until you are 4" from the end. Snip your super long strip in half at this point and then continue your seam to the very end and cut your thread.
- Now take your two-strips-wide piece and place the two ends together, right sides facing and, again, sew a 1/4" seam for the full length stopping 4" before the end to cut it in half again. Complete the seam.
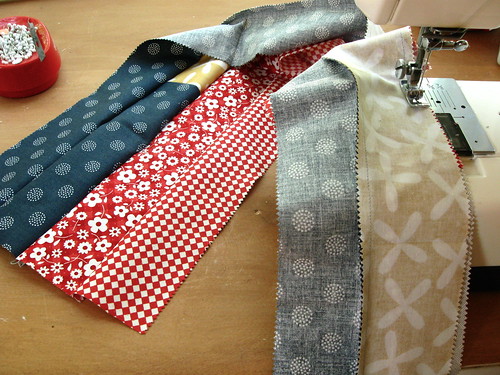
- Keep sewing like this until you have a piece of sewn fabric that is 16 strips wide. (The photo below is 8 strips wide.) As you keep sewing the strips together, keep in mind that pooling color works well for this pattern.

- Press all seams until they lie flat on your 16 strip wide piece of fabric.
- Cut your 16 strip piece in four equal sections. Trim the edges of each piece until you have four pieces that are 25" wide.
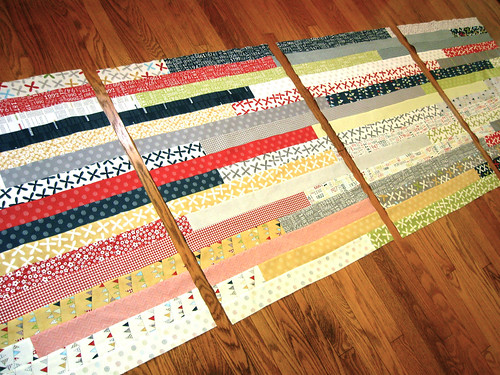
- Now measure the length of your sections. If you have perfect 1/4" seams for your 16 strips, your fabric piece will be 32 ½" wide. Mine, however measures 32 inches. This measurement is very important, so do this step carefully.
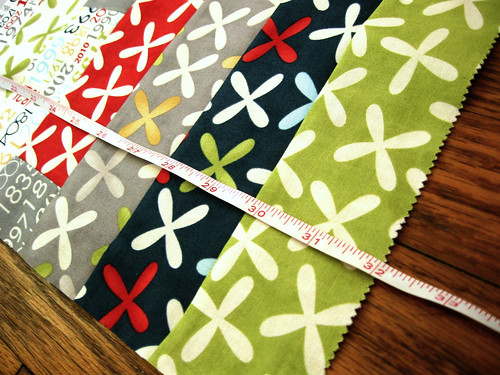
- Since the center square is inset and we don't want to trim any fabric at the end, we have to carefully calculate the exact size of the square.
32 ¼", cut a 7 ¾" square.
32", cut a 7 ½" square.
31 ¾", cut a 7 ¼" square.
31 ½", cut a 7" square.
31 ¼", cut a 6 ¾" square.
31", cut a 6 ½" square.
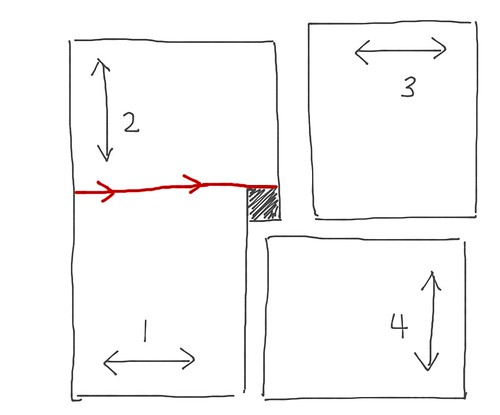
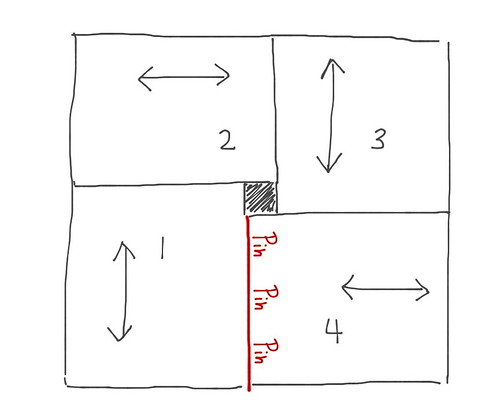
- Arrange your center square and your strip sections like this:
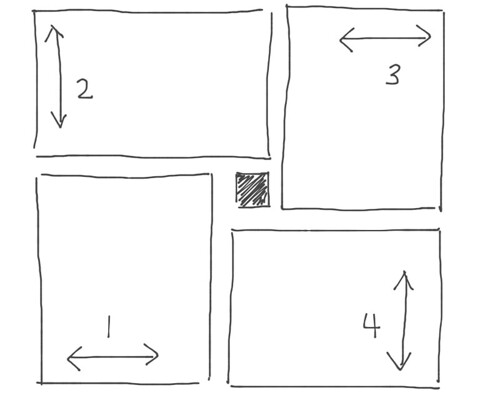

- Sew the center block to section 1 leaving one inch open (see below).
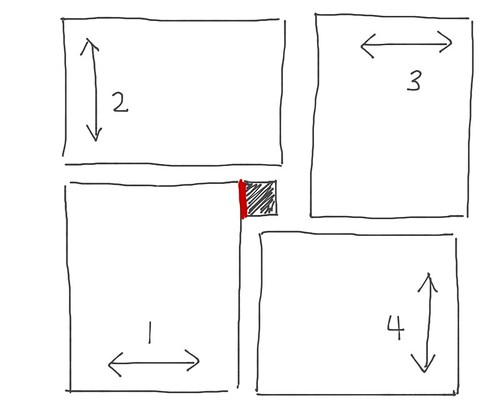

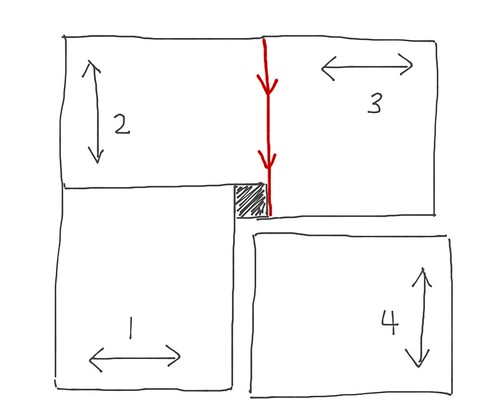
- Sew section 2 onto section 1 plus the center square. Make sure this seam goes edge to edge. I pinned before sewing.

- Sew section 3 onto that and make sure this seam goes edge to edge. Again, I pinned first.
- Sew section 4 along the bottom edge of section 3 and the center square.
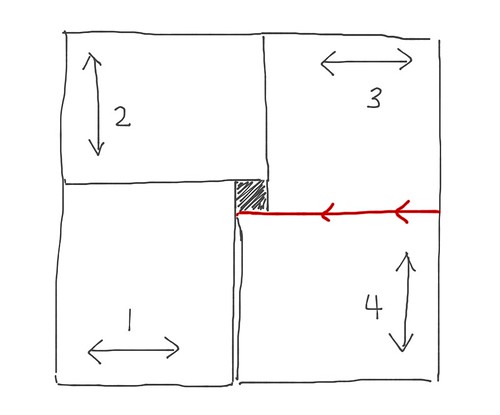

- Lastly, pin, pin, pin section 4 to the edge of section 1 and close up the seam along the edge of the center square.

- Press your seams and you now have a finished quilt top!

Let me know if you make a quilt using this tutorial. I'd love to see it!
17 comments:
Great tutorial and quilt. Thanks for explaining how to end each strip on the jelly roll construction, I've watched the video before and never saw how to end off. So simple!
Nicely done -- a very well written tutorial and a sweet quilt!
Great quilt and tutorial! I have made the jelly roll race quilt and it was so much fun! I really like your version and would definitely make it! Thanks for the inspiration!
Great tutorial very well written! Thanks so much and can't wait to show you mine!
Great tutorial - thank you! Definitely one I'll have to try :)
What a great idea! Thanks for the tutorial!
this is fantastic! And a quilt top saver... I really wanted to try the jelly roll race idea one evening, so I used a honey bun... it is such an awkward size now, but I am going to try and fix it with this tutorial :)
Thank you! I may take this to my next sit n sew (so I'll help if I need it to put the center square in -- not you, I just have trouble reading directions). I make several donation quilts each year and this would be a relatively fast one on those days when you need a finish to make you feel good!
Great tutorial, love it, and the finished quilt.
Love this!
Thank you for sharing the tutorial. It's a great quilt. Another good reason for loving jelly rolls.
love your JR Race adaptation! so clever and cute!
Love this twist on a Jelly Roll Race quilt. Have you done this in any other sizes? Does this translate using 18, 20 or 22 strips? Do you have the math for these sizes? My brain is somewhat addled this morning and I can't seem to work this out.
Lori, I'd be happy to help you with the quilt math. Please email me at cinnaminda1 at yahoo.
How many strips were in your jelly roll if you don't mind my asking?
Im loving how quick this quilt is coming together. Did you have any trouble getting the laat seam to line up? Its causing the center square to pucker up.
Marciamparker@gmail.com
a must try .. I am not a "real" quilter but I'm loving this. Maybe I can learn along with your posts. thank you
Post a Comment
You are awesome! Thanks for leaving a comment :)